It is Friday! Happy Fri-YAY everyone! What does that mean is for the blog? – Tips, Tricks, and Techniques. Today I have two awesome tricks to show you. One is making your own stencil for ink blending. The other is a trick for custom wording. This week we focused on the Counting Sheep Stamp Set and Sheep Dies from the August to September 2021 SALE-a-bration Brochure and both tricks are used on the same card.


The pictures above show a sneak peek of tomorrow’s blog post, where I will show these two tricks on my Facebook Live Session, Saturday at 4 pm EST. They are both simple but lots of fun to do. Let’s begin.
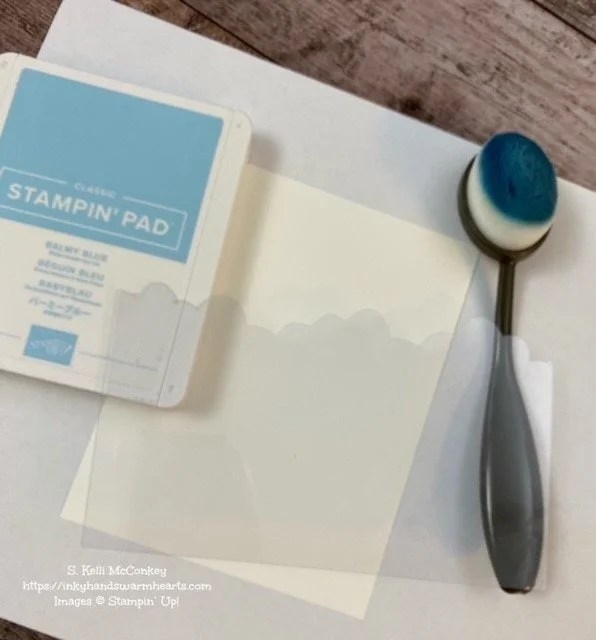
Two tricks – This is what you will need for Trick #1.

Figure 1 
Figure 2 
Figure 3
I used a window sheet and die cut the cloud stencil from the Basic Borders Dies. Because they are stitched, I then cut the stitching off with my Paper Snips so that I would have a smooth surface. If you do not have these Dies, you can just freehand a cloud shape across your window sheet with a sharpie, and then fussy-cut it out with your Paper Snips.
Refer to figure 1 and pick up ink in a circular motion from your ink pad with a Blending Brush.
Dab off the first ink onto your scrap paper to avoid a blotchy spot on your card. Next, move over the edge of the stencil depositing ink onto the cardstock. I use circular motions to do this.
Proceed to move the brush in a circular motion over the top of the cloud stencil you made until the surface underneath has the amount of ink you wish deposited onto it. Next, move down until you fill the desired amount of cardstock.

When you are finished, it should look somewhat like this.

Two tricks – This is what you will need to do Trick #2

Figure 4 
Figure 5 
Figure 6 
Figure 7 
Figure 8 
Figure 9
Start by using your Stampin’ Write Black Marker to color in the desired first letter. See figure 4. In my case, it was the letter H. Stamp it onto your cardstock. Next, clean your stamp as in figure 5.
Ink up the second letter as shown in figure 6. In my case, I needed the second sentiment for the letter E as Birthday doesn’t have an E in it. Clean your stamp again.
Ink up the third letter and stamp it down trying to line it up as best you can. With Cling Stamps, it is a bit harder. You cannot see through the stamp. Notice, my E is a bit higher than the H and R in figure 7. I think it adds character to the piece.
Clean the stamp. Next, ink up the fourth letter and stamp it down. I went a bit closer with this one as you can see in figure 8. Again I think it adds to the charm.
Using your trimmer, cut your stamped custom word as shown in figure 9.


As you can see in the two pictures above, the custom wording turned out great!
Now try these two tricks, comment below, and tell me what you think. Watch tomorrow on my Facebook Live Session, as I demonstrate both these tricks. They will be used on a project. Feel free to comment below with any questions you may have, and I will be happy to help in any way that I can. If you want to see last Friday’s blog post that shows another Tip, Trick, or Technique, please click here.

Don’t forget, if you put in an order ($35 minimum) by tomorrow, Saturday, September 18, 2021, by midnight, I’ll send you the make and takes from Tuesday and Thursday’s Live Sessions for free! (You’ll need the stamps, ink, and adhesive to complete these projects. I will include all the paper and embellishments.) If your order is over $50, you’ll get all the supplies plus a free monthly gift from me!
Thank you for supporting my small business and ordering from me.
Don’t miss out. Your order MUST be in by Saturday at midnight. If so, you will receive both free Make and Takes!!
And you must use the Hostess Code.
September’s Hostess Code is JMAJC6TP. Use it for orders under $150.00.
Using that hostess code helps me bring you videos every week and helps me provide the pdfs and gifts of appreciation. Thank you again for your support!
You can shop in my online store here.
As always, thank you for visiting me 🙂
I appreciate your comments and/or feedback and see you Saturday afternoon at 4 pm EST for Bonus Project Saturday Facebook Live Edition!
Thank you for supporting my small business!
See you next week!
♥Kelli

Leave a Reply